For RV owners, ceramic coating is a surface treatment that adds a water-repellent layer to compatible exterior finishes with the aim of making ongoing cleaning and protection easier. This 2026 guide reflects Royal Touch Mobile Detailing LLC’s faith-driven commitment to doing work right the first time, with practical guidance for owners whose vehicles combine large panels, different materials, and hard-to-reach surfaces.
- Ceramic coating for RV owners starts with surface compatibility and preparation, not a durability claim.
- Royal Touch Mobile Detailing LLC offers RV detailing and ceramic coating for owners seeking mobile service.
- Paint correction addresses finish defects; ceramic coating does not replace it.
- Choose protection around your RV’s finish, storage conditions, and wash routine.
Why ceramic coating matters for RV owners
An RV exterior is not one uniform surface. Painted panels, gelcoat, graphics, trim, windows, and roof materials require different care. A coating suitable for one surface is not automatically suitable for the whole RV.
Road grime and outdoor storage also make cleaning a recurring job. A compatible ceramic coating provides a water-repellent surface, but it does not remove the need to wash, address contamination, or inspect seams and seals. Choose it as part of a maintenance plan, not as a substitute for one.
Royal Touch Mobile Detailing LLC is best for RV owners seeking mobile detailing and ceramic coating services. The family-owned company serves North Carolina and parts of Virginia and South Carolina; confirm your location and RV’s needs through Royal Touch Mobile Detailing LLC.
For your 2026 protection plan, start with the finish you have today. A glossy painted motorhome and a weathered gelcoat trailer need different preparation, even if both owners want easier washing.
How to plan ceramic coating for your RV
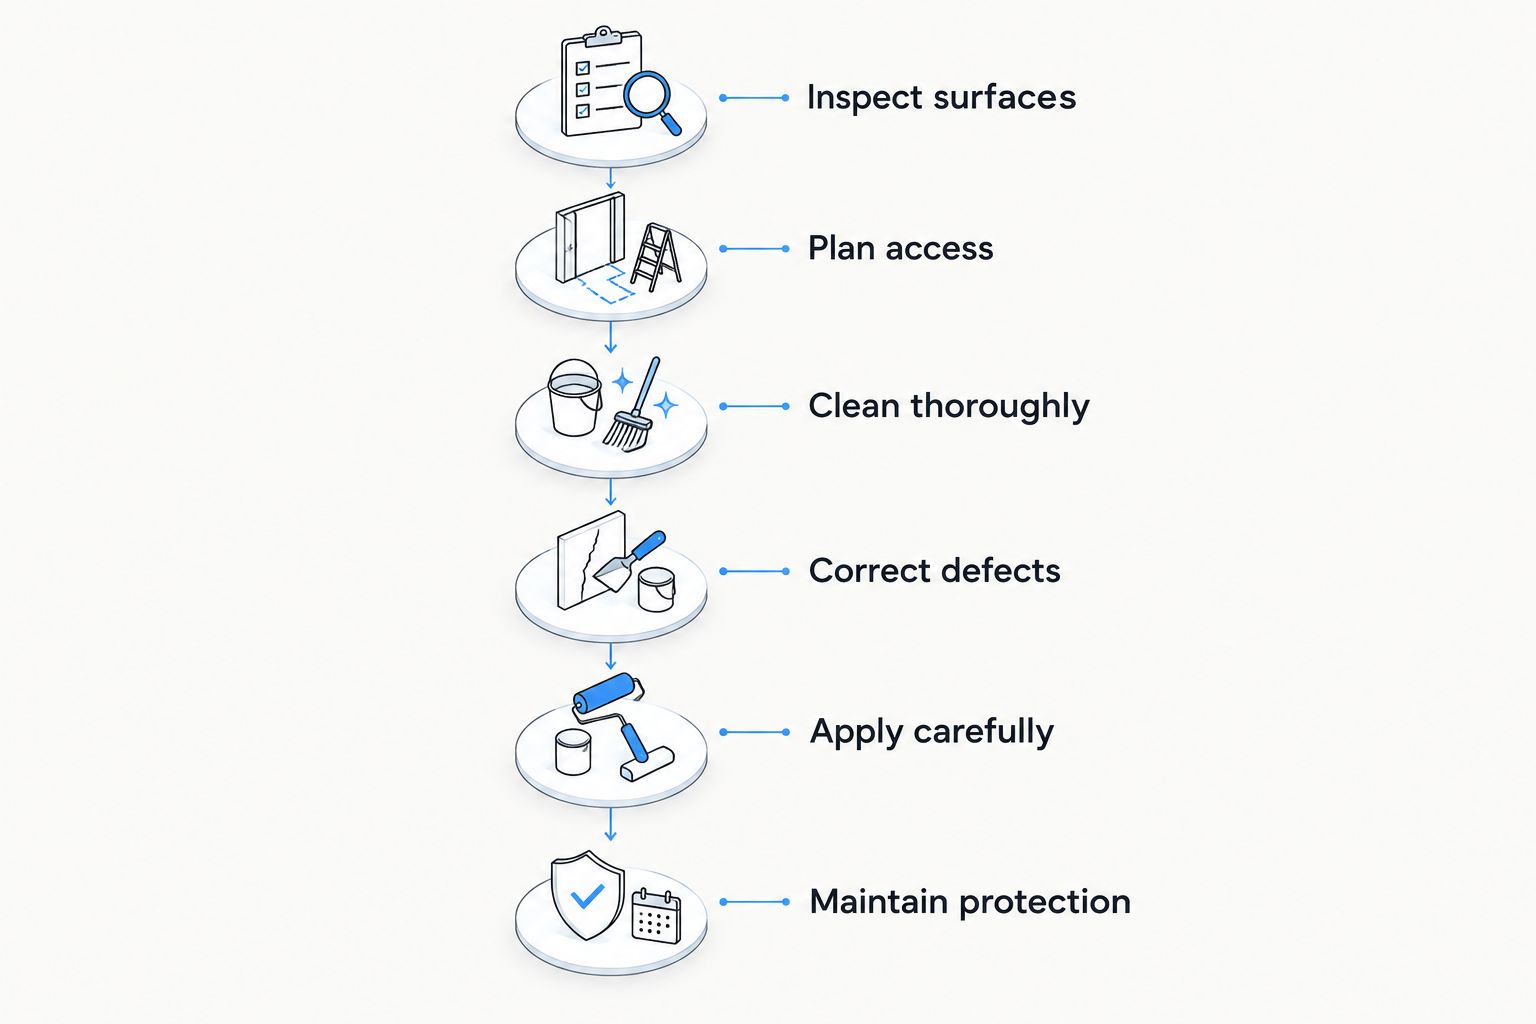
Work through the process in this order: inspect surfaces, plan access, clean thoroughly, correct defects, apply carefully, and maintain protection. Each decision affects the next. Applying protection before resolving compatibility or preparation issues puts the wrong task first.
Inspect surfaces
Begin with your RV owner’s manual and the care instructions for its exterior materials. Walk around the vehicle in daylight and record which areas are painted, gelcoat, graphics, plastic, rubber, or another material. Photograph existing defects so the starting condition is clear.
Look beyond shine. Chalky residue, peeling graphics, damaged clear coat, and failed sealant are different problems, and a coating does not repair them. Roof leaks and loose exterior components belong in a repair discussion before cosmetic detailing.
Keep your 2026 inspection notes with the RV’s maintenance records. They give you a useful reference when discussing preparation and checking the finish later.
- Identify each exterior material before selecting protection.
- Photograph oxidation, scratches, peeling graphics, and damaged trim.
- Check the RV manufacturer’s cleaning and surface-care instructions.
- Separate repair needs from cleaning and appearance work.
- List surfaces that need to remain outside the coating scope.
Plan access
Check the work location before arranging any application. You need room to move around the RV, safe access to upper panels, and conditions that meet the selected coating’s instructions. An open parking space alone does not establish a suitable application area.
Large sidewalls make lighting and access especially important. A detailer needs to see residue and application boundaries, not just reach them. Never stand on a roof unless the RV manufacturer permits it and the access method is safe.
Decide whether you can manage the preparation yourself. If reaching upper surfaces safely is the obstacle, mobile service can address the travel burden without requiring you to handle the detailing work.
- Confirm permission to perform detailing at the location.
- Discuss shade, weather exposure, and available working space.
- Ask whether water or power access is required.
- Identify safe access for upper panels and the roof.
- Plan around travel and the coating’s stated curing instructions.
Clean thoroughly
Start with the approved wash process for your RV’s materials. Rinse loose dirt, wash with compatible products, and clean tools as they become contaminated. Work in manageable sections so cleaning solution does not dry before you rinse it.
Washing and removing bonded contamination are different tasks. A surface can look clean while still holding residue that interferes with preparation. Choose any additional cleaning method around the finish and coating instructions; do not assume an automotive paint-preparation product suits graphics or roof membranes.
Royal Touch Mobile Detailing LLC offers RV detailing and ceramic coating, giving owners a mobile service option rather than taking on the entire process themselves. Discuss the cleaning scope before booking so roof care, graphics, and exterior compartments are not left to assumption.
- Use cleaners approved for the material being washed.
- Keep wheel-cleaning tools separate from body-cleaning tools.
- Remove insect residue without scraping the finish.
- Inspect washed panels for remaining contamination.
- Discuss material-compatible paint preparation methods.
Correct defects
Inspect the clean, dry finish before deciding whether it needs polishing. Ceramic coating is not a scratch filler or an oxidation repair. If you want existing finish defects addressed, that work belongs before protection.
Paint correction removes a small amount of the finish to reduce suitable defects. Gelcoat requires its own assessment and preparation approach. Neither surface should be polished aggressively just to reach an appearance goal that ignores its condition.
Approve the correction scope separately from the coating scope. Ask what can be improved, what should remain untouched, and which defects require repair instead. This keeps the conversation grounded in your RV’s actual surfaces rather than a generic package description.
- Inspect the finish under lighting that reveals defects.
- Distinguish surface marks from peeling or failed coatings.
- Request a small test area before broader correction.
- Keep graphics and delicate edges within their approved care limits.
- Record defects that will remain after preparation.
Apply carefully
For a DIY application, follow the selected coating manufacturer’s instructions exactly. Surface compatibility, temperature limits, residue removal, and curing requirements belong to that product’s directions. A method used on another vehicle is not a replacement.
For professional service, ask how the installer handles the RV’s different materials and large panels. The discussion should cover where the coating goes, where it does not go, and how the finished surface will be inspected.
Royal Touch Mobile Detailing LLC offers ceramic coating alongside RV detailing and paint correction. Confirm the proposed coating scope directly; the service name alone does not establish that every roof, window, graphic, or trim piece will receive the same treatment.
- Confirm the coating is intended for each included surface.
- Follow the specified environmental and application conditions.
- Divide large panels into manageable working sections.
- Inspect for uneven residue before it becomes difficult to remove.
- Follow the stated restrictions during curing.
Maintain protection
Build your 2026 maintenance routine around the coating instructions and your RV’s use. Keep the wash process gentle, use compatible cleaners, and deal with contamination rather than allowing it to accumulate between trips.
Water beading is useful to observe, but it does not tell you everything about the surface. Dirt or residue can change how water behaves. Clean and inspect the RV before deciding that its protection needs another application.
Remember the uncoated parts, too. Roof materials, seals, graphics, and trim still need their own maintenance. Ceramic coating is a finish-care task; it does not replace the RV manufacturer’s inspection schedule.
- Keep the coating’s written care instructions accessible.
- Use clean wash tools and material-compatible products.
- Inspect for insect residue, bird droppings, and other contamination.
- Review roof and seal maintenance separately.
- Record cleaning dates and changes in surface condition.
Discuss your RV protection plan
Confirm your location, exterior condition, and the preparation needed before choosing ceramic coating.
Compare protection options for your RV
Choose the option you can prepare and maintain correctly. A product’s category does not establish its suitability for every RV material, and professional application does not eliminate ongoing care.
The comparison below separates protection choices from application choices. Wax, sealant, and ceramic coating describe treatments; DIY and professional service describe who performs the work.
| Option | Best for | Main advantage | Key limitation |
|---|---|---|---|
| Compatible wax | Owners comfortable renewing exterior protection | Supports a repeatable wash-and-protect routine | Requires renewal and material-specific selection |
| Compatible paint sealant | Owners wanting a synthetic protective treatment | Offers another protection approach for suitable finishes | Compatibility and care instructions still control use |
| DIY ceramic coating | Owners with safe access and confidence in surface preparation | Gives you direct control over preparation and application | You handle compatibility checks, application conditions, and residue removal |
| Professional ceramic coating | Owners wanting help with preparation and application | Places finish assessment and application with a service provider | Requires suitable access, scheduling, and continued owner maintenance |
Professional ceramic coating is the stronger fit when preparation or safe access exceeds what you can handle yourself. DIY is a reasonable route only when you can follow the product instructions and complete the work safely.
Do not choose wax simply because it sounds familiar, or ceramic coating simply because it sounds permanent. Neither label replaces a clear material match and care plan. For 2026, the useful question is which option fits your RV and the maintenance you will actually perform.
Common mistakes RV owners make
Treating the exterior as one material
Using one cleaner or coating across painted panels, roof membranes, decals, and rubber ignores the differences between those surfaces. Make a material map first and confirm treatment compatibility for each included area.
An excluded surface is not a service failure. Leaving an unsuitable material untreated is better than applying something its manufacturer does not approve.
Coating over oxidation or damaged graphics
A protective layer does not restore a failing finish. Weathered gelcoat needs assessment, and peeling graphics need a repair or replacement discussion rather than another product on top.
Ask for the preparation recommendation before approving application. The order matters: establish a suitable surface, then protect it.
Booking without checking the work location
Mobile detailing still needs a workable location. Tight storage lanes, poor access, or restrictions on washing can complicate the job before preparation begins.
Explain where the RV sits and whether it can move. Confirm the location requirements with the provider instead of assuming the service can happen anywhere.
Expecting coating to prevent every kind of damage
Ceramic coating does not make an RV scratch-proof, stone-chip-proof, or maintenance-free. Avoid treating water repellency as evidence that the exterior no longer needs care.
Keep coating maintenance separate from impact protection and repairs. Those needs require different decisions.
Neglecting the roof because the sidewalls look good
Glossy sidewalls do not tell you whether roof seams, seals, or fittings need attention. Appearance and weatherproofing are separate responsibilities.
Follow the RV manufacturer’s roof and seal inspection guidance even when the coated surfaces look clean. Do not allow a cosmetic improvement to distract from maintenance that protects the vehicle itself.
FAQ
Is ceramic coating worth considering for an RV?
Ceramic coating is worth considering when you want a water-repellent treatment on compatible RV finishes and will maintain it properly. Base the decision on surface condition, safe application access, and your wash routine rather than a promise of maintenance-free ownership.
Can ceramic coating go on RV gelcoat?
Ceramic coating can be used on gelcoat when the selected product is intended for that surface. Inspect and prepare the gelcoat first, and address oxidation before applying protection.
Can I ceramic coat my RV myself?
You can apply an appropriate DIY ceramic coating if you can prepare the surfaces, access them safely, and follow the product instructions. Large panels and mixed exterior materials make the job different from coating a passenger car.
Does an RV need paint correction before ceramic coating?
An RV needs paint correction when suitable paint defects must be reduced before coating, not simply because coating is planned. Assess painted surfaces separately from gelcoat, graphics, and damaged finishes.
Can ceramic coating be applied over RV decals?
Apply ceramic coating over RV decals only when the decal and coating instructions permit it. Peeling, cracked, or deteriorated graphics need assessment before any protective treatment.
How long does ceramic coating last on an RV?
Ceramic coating service life depends on the selected product, preparation, exposure, and maintenance. Follow that product’s published guidance rather than assuming a duration from the ceramic coating label.
Can mobile detailing include ceramic coating for my RV?
Mobile detailing can include ceramic coating when the provider offers it and the location meets the application requirements. Confirm your service area, access, preparation scope, and curing arrangements before booking.
One last thing
Ask for a written list of surfaces that will not be coated. Most owners focus on what is included, but exclusions clarify the remaining maintenance work: roof care, seals, graphics, trim, and any damaged finish.
Keep that list beside your 2026 RV maintenance notes. A clear boundary between protection, cleaning, and repair helps you care for the whole vehicle—not just the panels that shine.